Index:
• Getting Started with EzInvoice Pro
• Contacts
• Invoices
• Printing Invoices and other Documents
• Expenses
• Reports
• Free App
• Demo App
-------------------------------------------------------------
You can contact us anytime if you need help.
EzInvoice Pro runs in Firefox, Chrome, Brave, Opera. Safari, and even Seamonkey! .
-------------------------------------------------------------
After you've created your account you need to login using the username and password you chose when you created your account.
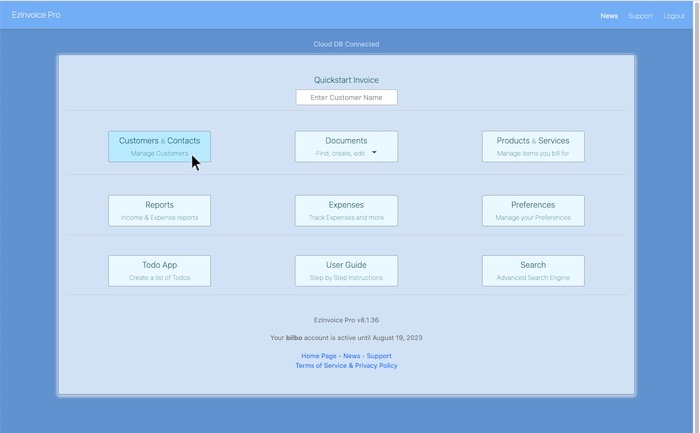
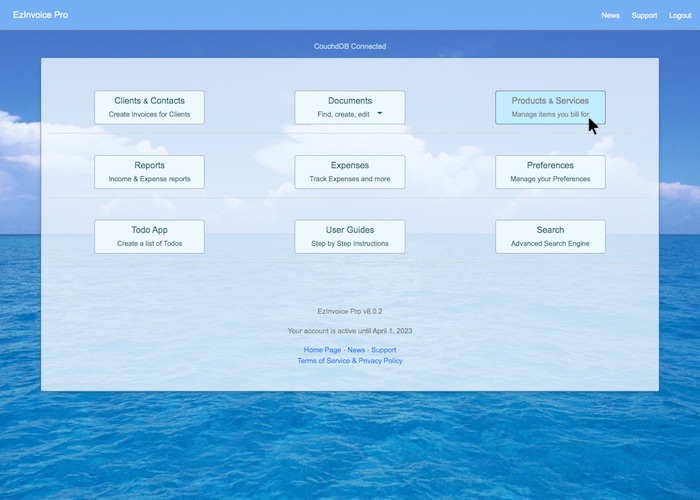
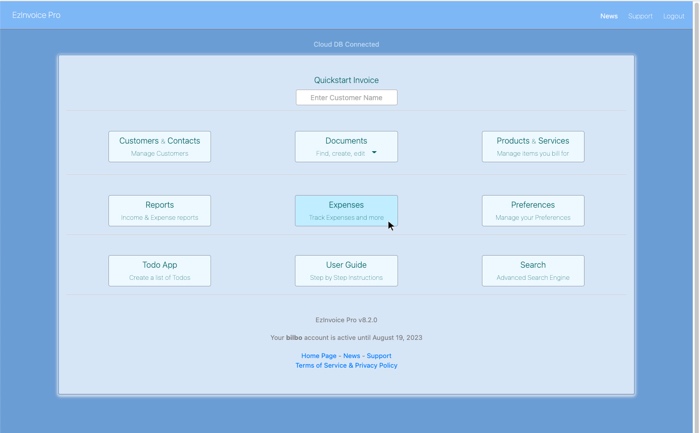
After you've logged in you'll see the "home screen".
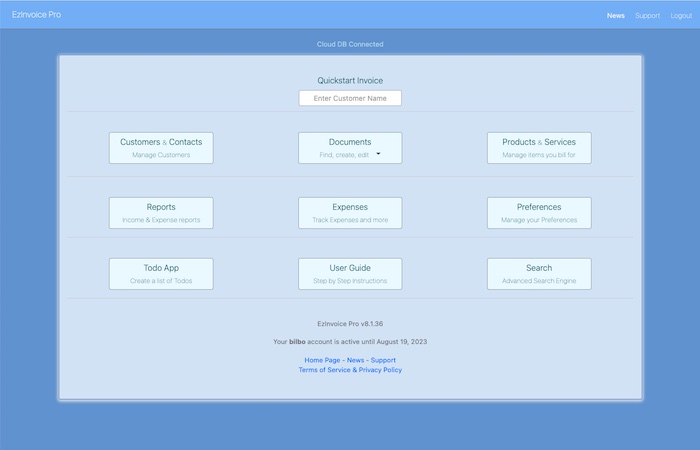
The first thing you'll want to do is setup your Preferences so just click or tap the Preferences button.
-------------------------------------------------------------
EzInvoice Pro Preferences Index-------------------------------------------------------------
The first thing you need to do in your Preferences is fill out all of Your Business Contact Info
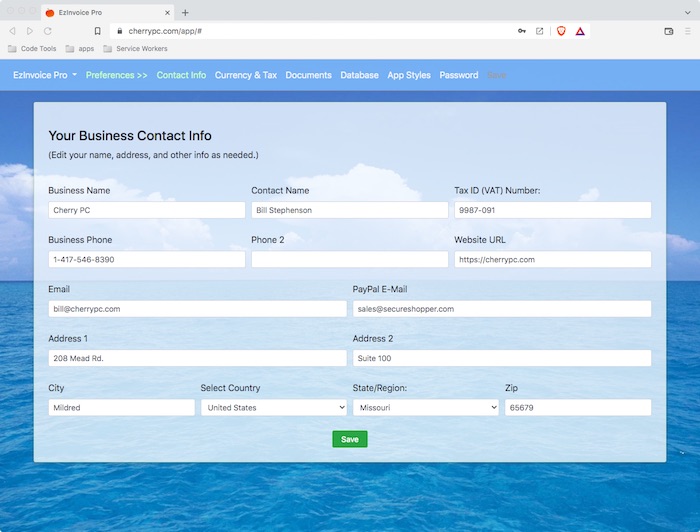
Whenever you make changes that need to be "Saved" you'll see the "Save" link in the menu bar change colors. That let's you know you need to click the "Save" button in the Menu Bar at the top of the screen:
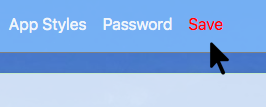
Be sure to Save any changes you've made!
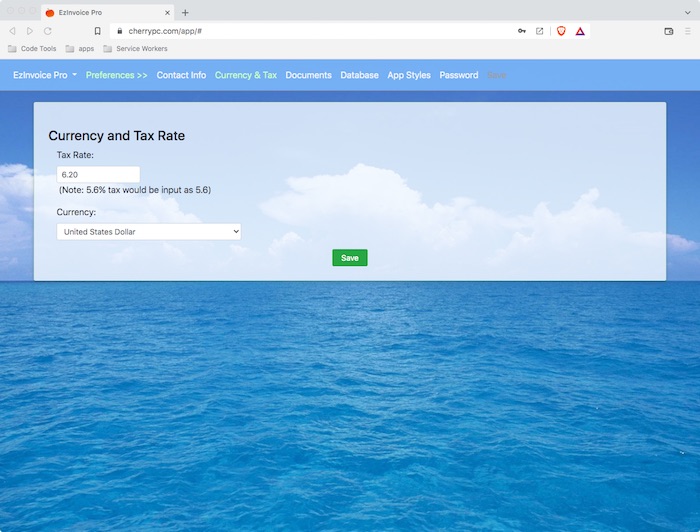
When you're all finished click the Currency & Tax link on the Nav Bar at the top of the screen.
You can set your tax rate and currency on this screen.
---
Next you'll want to click the Documents link on the Nav Bar.---
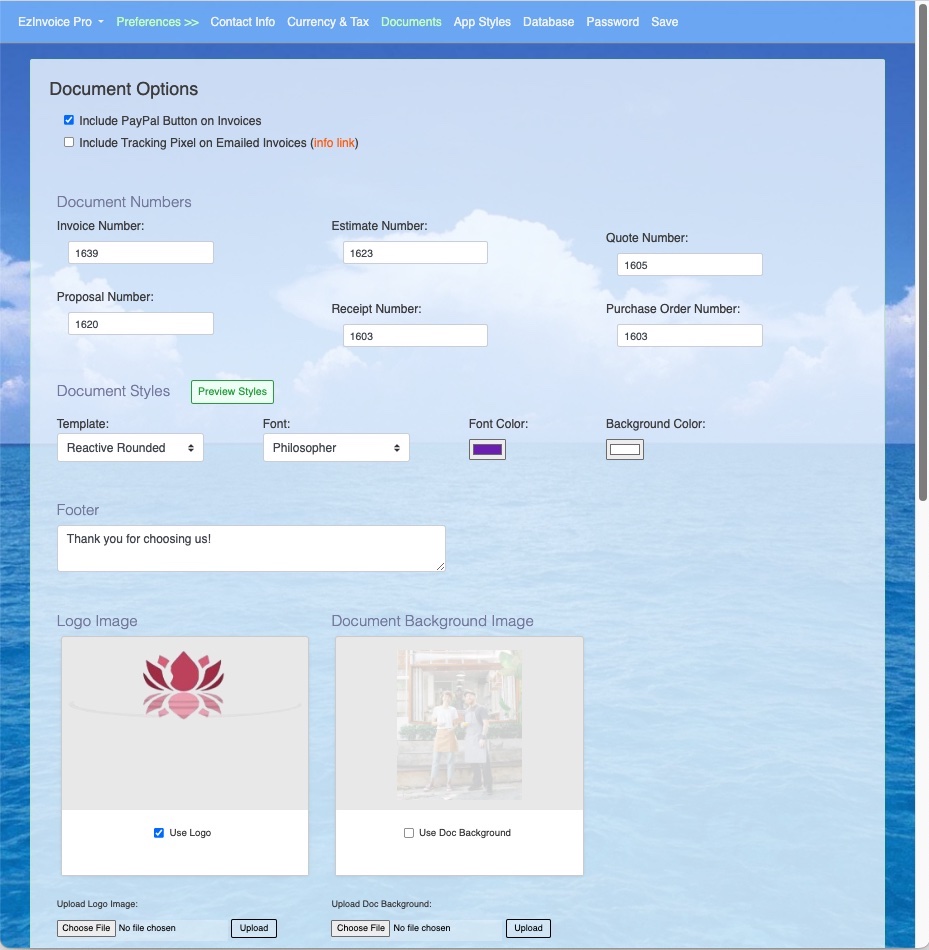
The Documents screen lets you set the document numbers for Invoices and other documents. The app will increment these numbers for all of the different Document Types you can create (Invoices, Estimates, Receipts, etc)
You can include a PayPal button by default on Invoices you email by checking the "Add PayPal" checkbox.
You set the document number for each of the documents types you can create with the app. When you save a new document the app will increment this number if it matches your document number.
For example, if this number is "1000" the next invoice you create will be number 1000. When you save your document the number here in your Preferences will be incremented to 1001.
You can change the number when creating an invoice (or other documents) to something else if you want and the app will not increment the number in your Preferences when you save it.
You can choose from 3 "Reactive Design" styles. These use a newer type of html designed just for emails so we recommend you use the Reactive templates. There are also 8 older styles, some that go back over 20 years, you can use.
You can choose from over 20 different font styles, but there are a few things you need to know about that.
When you print a document, or create a PDF document, the font you choose will always be used. But that's not the case when you email a document. Some email services ignore fonts, and some email apps, like Thunderbird, ignore them. Apple's "Mail" app will use your selected font and others may as well.
You can set the font color for your documents.
You can also add a nice note to be used in the footer of your documents in this screen.
You can also change any of those options when creating or editing a document.
You can also upload your Company Logo and upload a Background images for your Documents. You'll see instructions and guidelines for those below the upload buttons. The Checkboxes on those will turn those on/off for your default use. You can also turn your logo and document background images on/off when creating documents.
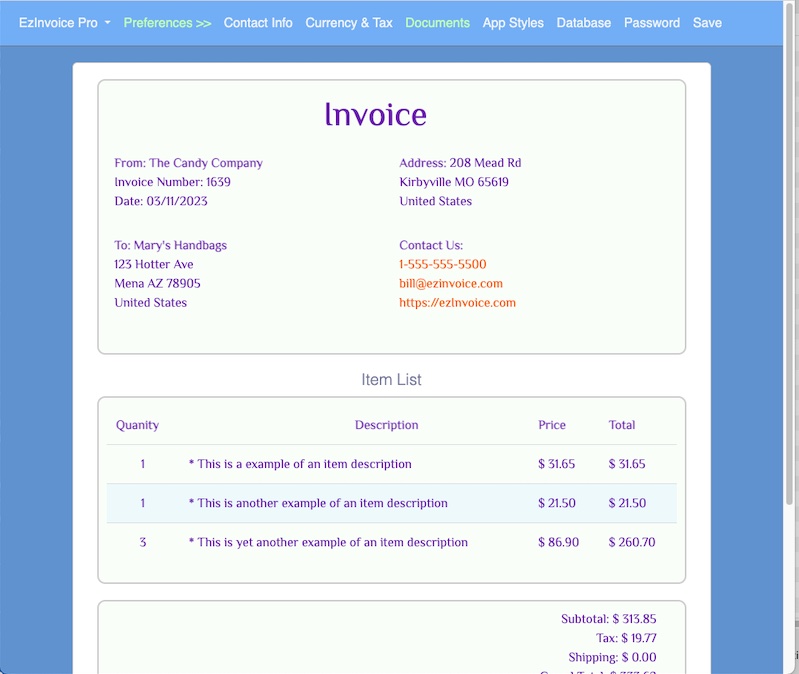
You can Preview your document options by clicking the "Preview Styles" button. This will show you what your Invoices or other documents will look like using your selected options.
When you're finished with the Document Preferences click the App Styles link on the Nav Bar.
--
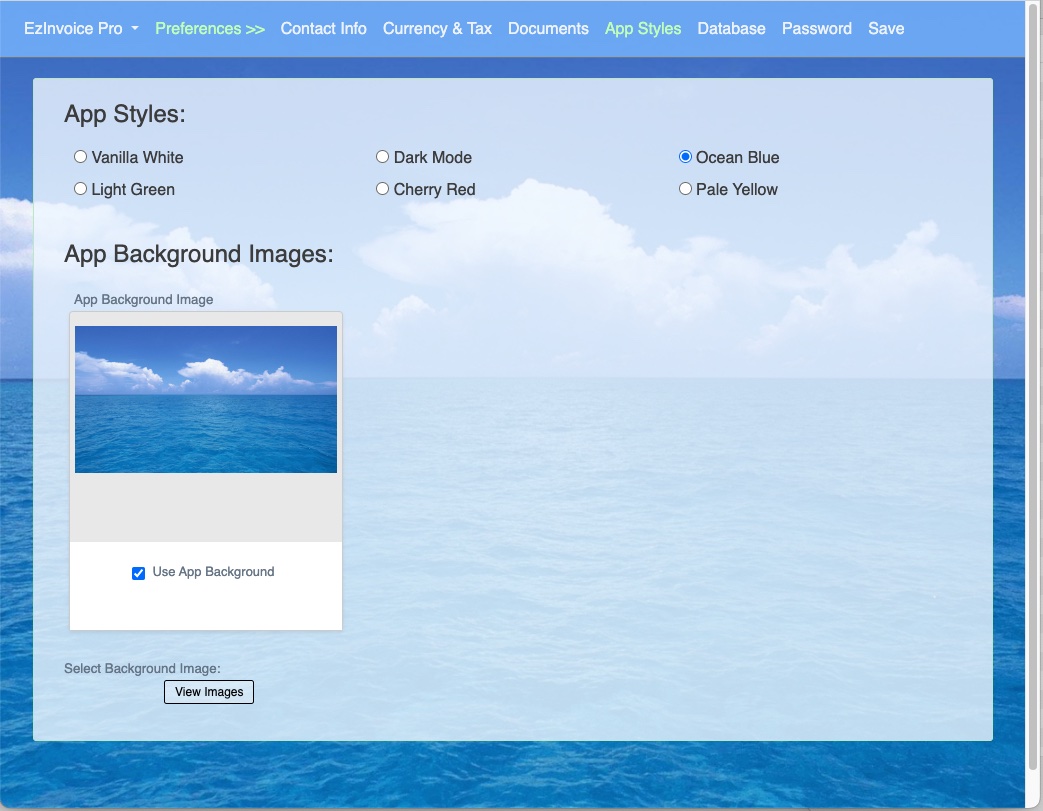
On the App Styles screen you can choose from 6 different styles for the app and select a background image for the app.
When you select an App Style and a background image you'll see the style change immediately. Your choice is saved automatically and will be used when you login again and on all the desktop PCs and mobile devices you use it on.
--
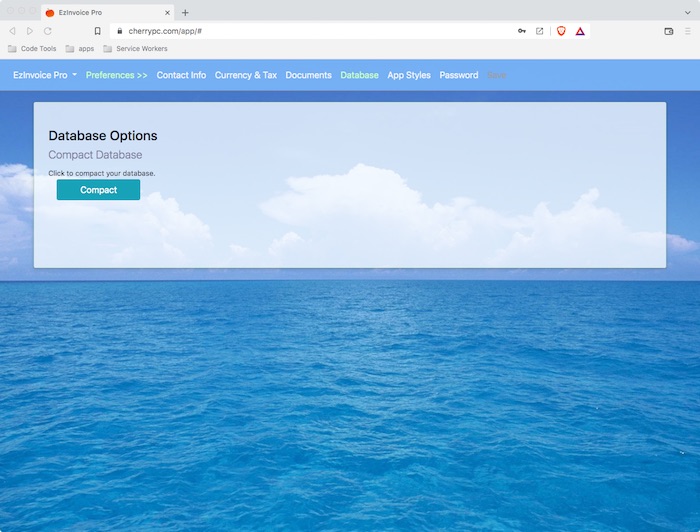
On the EzInvoice Pro "Cloud" app you can Compact your database. If you have several 1000s or more documents this can improve the performance of the app. You probably won't notice much difference if you only have a couple thousand documents.
--
--
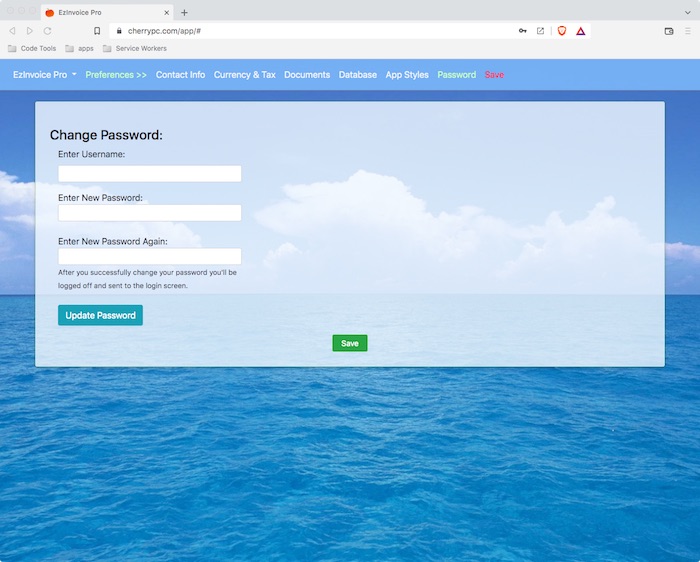
You can change your password anytime. Just be sure to save it somewhere else in case you forget it.
It's important to note that we cannot recover a lost password. What we can do is change your password and send it to you in an email at the email address you signed up with when you created your account. If we do that we recommend you login and change it again.
--
--
When you're all you're finished setting up your Preferences remember to save them by clicking the Save link in the Nav Bar.
That's all there is to the Preferences.
If you're just getting started then next you'll want to learn about the Contacts app.
And remember, you can always call or email us if you have questions or need help.
-------------------------------------------------------------
The Contacts App Index-------------------------------------------------------------
Click the Contacts button on the home screen to access the Contacts app:
The Contacts app looks simple but it's actually a very powerful Contact Management System.
There are two ways to open a Contact's record. You can click the Contacts link on the Contacts screen:

Or you can enter the first few letters in a contact's name and select it from the list that appears:
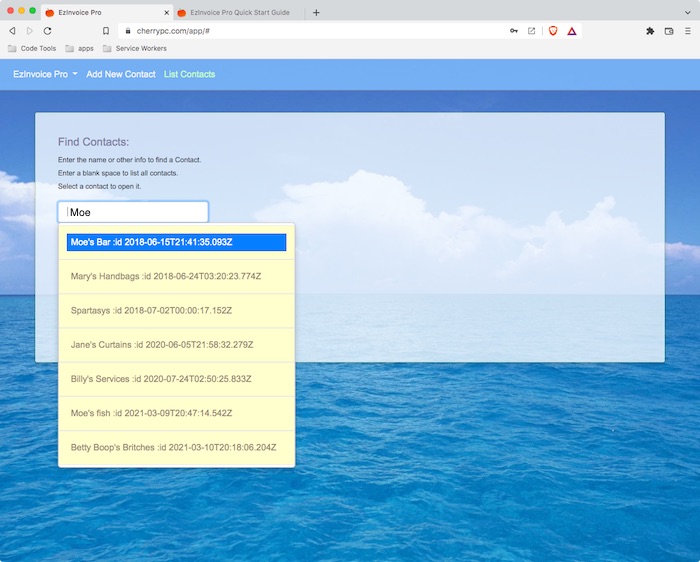
This makes it fast and easy to find exactly who you're looking for and all the documents you've made for them.
To add a new Contact click the "Add New Contact" link on the Contacts Nav Bar.

It's best to enter as much info as you can for a contact when you create or edit a Contact record.
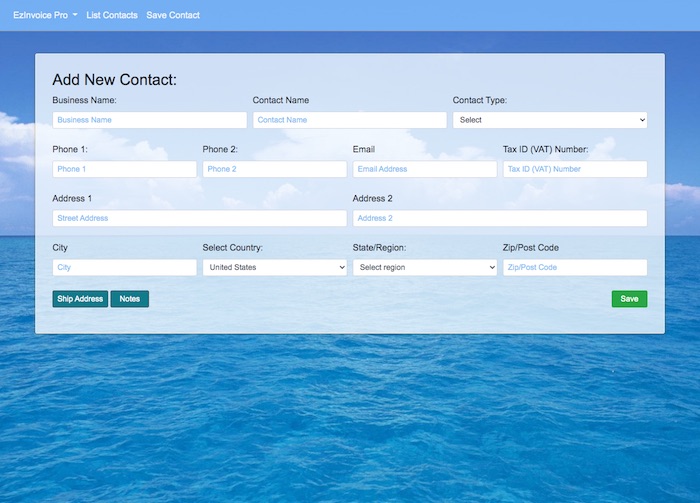
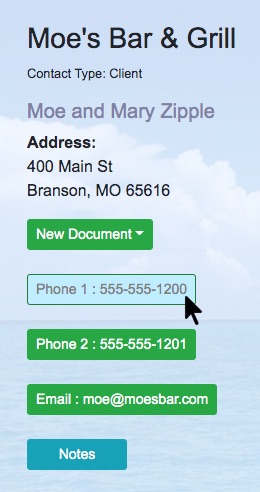
On the contact screen you can create a new document for them, like an Invoice, and also start a phone call, or send an email. You can also keep notes on a contact to remind you of any special needs or other important info.
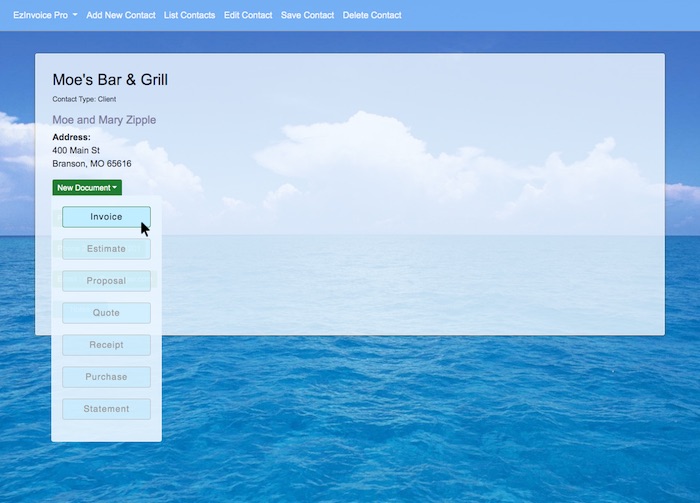
To create an invoice or other document for a Contact you can select the contact from the list and click the "New Document" button on the Contact screen.
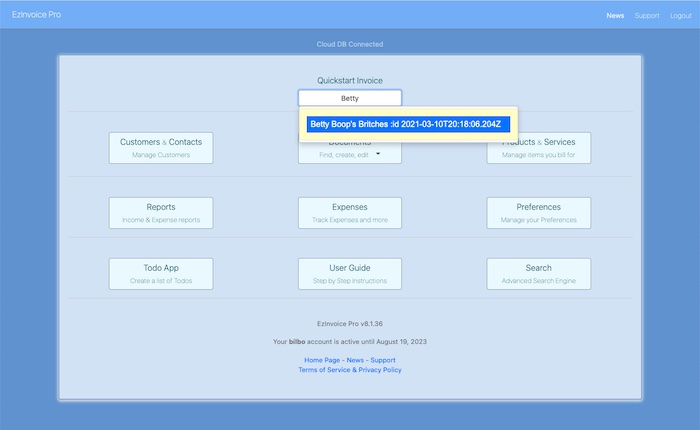
Or you can use the "Quickstart Invoice" feature on the home screen by entering the name of the business or Contact name:
If you're invoicing a customer who's already in your contacts app start their invoice by using the "Quickstart Invoice" feature on the home screen or selecting them using the Contacts app and then selecting the type of document you want to create for them by clicking the "Documents" button.
The app uses their Contacts info to "Fast Fill" the document and it tracks all the documents you've made for that contact. So, it's always best to start a document for an existing customer by using the Quickstart feature on the Home Screen or your contacts app.
You can also call or email a contact by clicking on their phone number or email address. You can enter two phone numbers for a contact:
-------------------------------------------------------------
The Invoice App Index-------------------------------------------------------------
If you're invoicing an existing customer who's already in your contacts app start their invoice by using the "Quickstart Invoice" on the Home Screen or selecting them using the Contacts app first.
For new clients and customers you can start by clicking the Documents button on the Home Screen and selecting the type of document you want to create for them and add them to your Contacts database when you save your document.
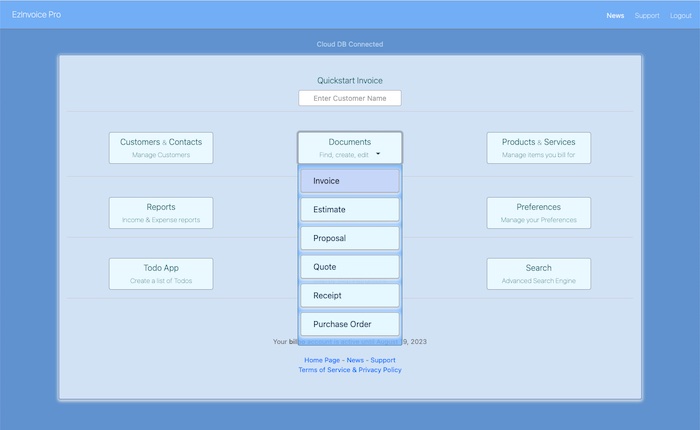
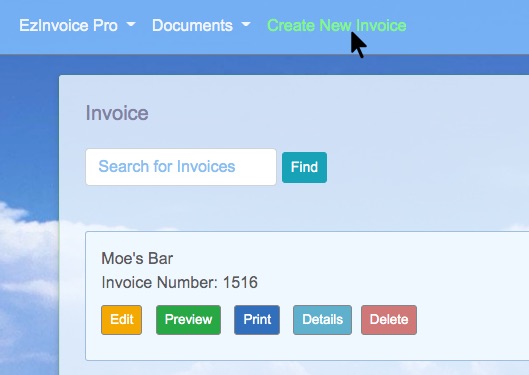
On your Home Screen click the Documents button, then select Invoice from the list that appears. On the next screen you'll see a list of your most recent invoices after you've made a few. Since we're making our 1st invoice we'll click "Create a New Invoice" on the Nav Bar.
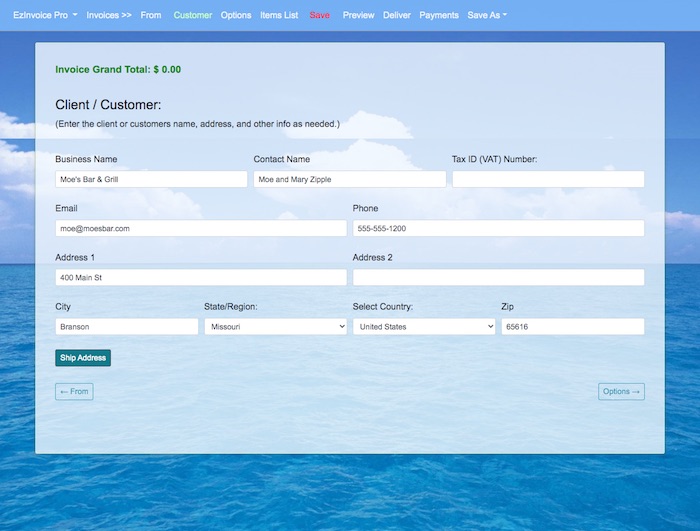
This brings you to the Customer screen in the Invoice app. You'll see the "Add to Contacts" checkbox is checked by default. If you don't want to add them to your Contacts app then uncheck this box. But, it's generally a good idea to add anyone you create an invoice for to your Contacts.
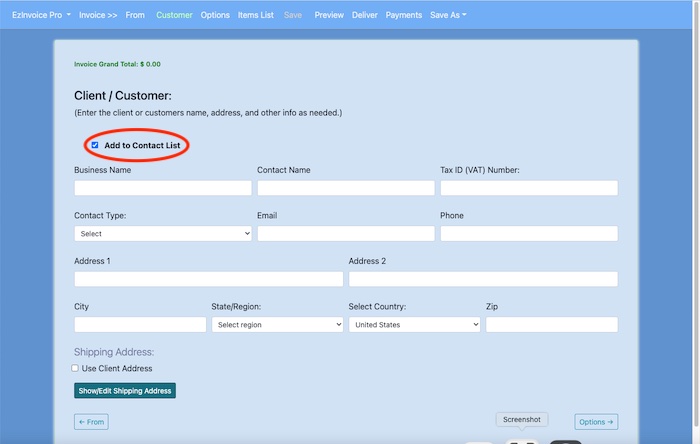
Fill in as much info as you can on your Customer screen. This makes it easier to find them in your Contacts app. Once you've filled in all their info click the "Options" link in the Nav Bar or click the "Options" button on the bottom of the screen.
The Options screen has checkboxes you can check to display your company logo on your invoice and add a PayPal button on invoices you email to your clients and customers.
You can also enter info for Shipping and Payment Due and edit your Invoice Footer and create a Note to Customer that will appear on your invoice.
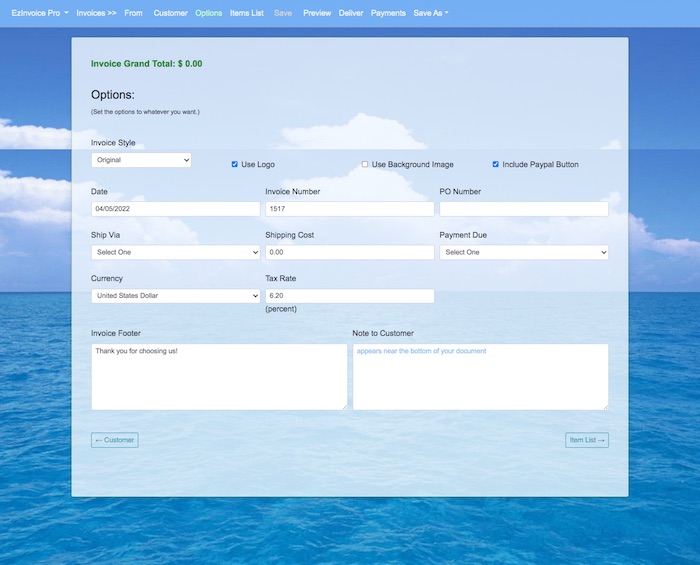
When you've got all your Options set the way you want click on the "Items List" link in the Nav Bar or the "Item List" button on the bottom of the screen.
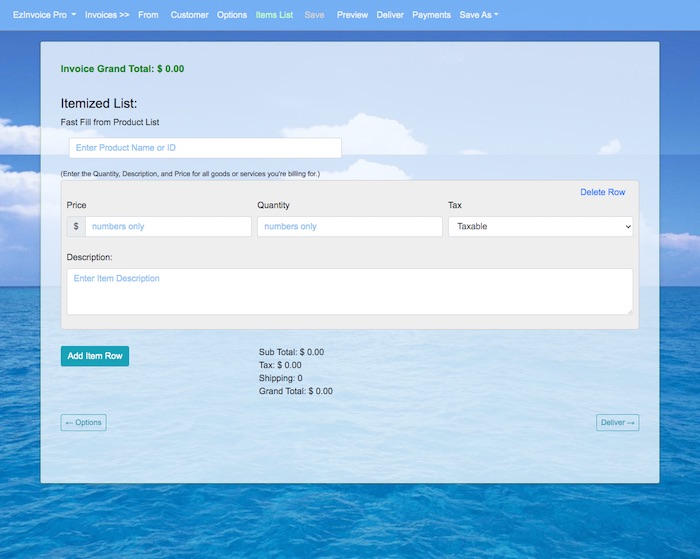
This brings you to the "Item List" screen. If you have a list of products or services you bill for often you can add those to your "Products & Services" app and just type a few letters of the product name or ID number into the "Enter Product Name or ID" text box and select the products or services you're invoicing for and it will "Fast Fill" the item info.
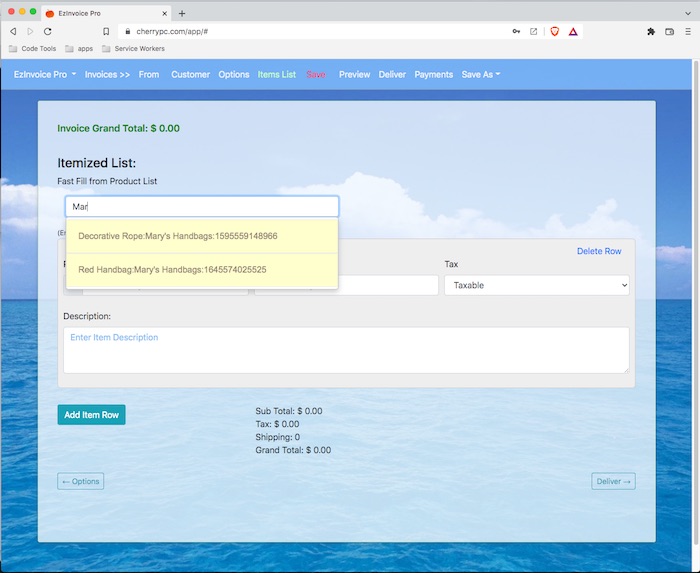
Or you can enter whatever it is you're billing for in the form that's shown.
You'll enter the Price, Quantity, a description of the product or service, and select rather it is taxable or non-taxable. The app will use the tax rate entered in your Options screen. As soon as you've entered a price and quantity you'll see the "Invoice Grand Total" update on the top of the screen.
You can add products and services by clicking the "Add Item Row" button or using the "Fast Fill" feature. You can add as many item rows as you want. You'll see the "Invoice Grand Total" update each time you add a new item and change the Quantity of items you're billing for.
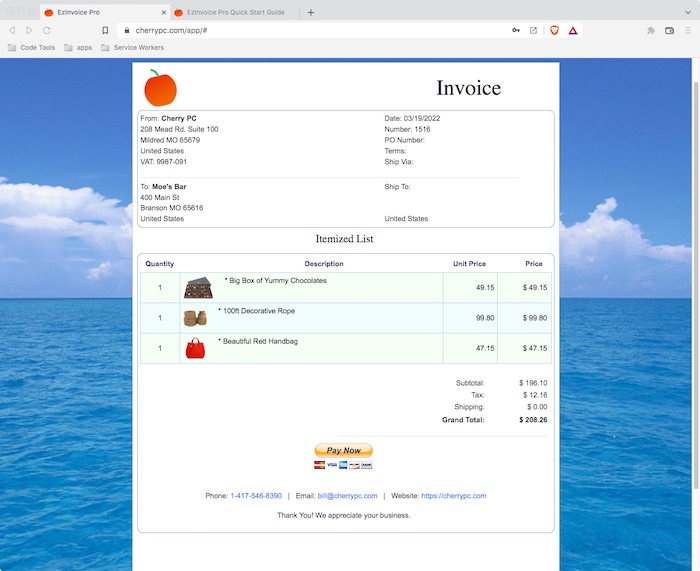
You can Preview your invoice anytime you want by clicking the "Preview" link in the Nav Bar. The preview will show you what your invoice will look like when emailed or printed.
Whenever you make a change you'll see the "Save" link in the Nav Bar turn red. This means you have unsaved changes.

When you're all finished creating your invoice make sure you've saved it. When you're ready to deliver your invoice click the "Deliver" link in the Nav Bar or the "Deliver" button on the bottom of the Items List screen.
When you Print or Email an invoice it uses your most recent saved version of the invoice, so make sure you've Saved your invoice before you print or email it.
When you Print your invoice the app will open a new window on your web browser and automatically send it to your printer. You can print it on paper or select to "Save as PDF" in most web browsers.
Or you can close the "Print" dialog box and Save the invoice using your web browser's
"File->Save" option and save it as a file like any other document you make.
On the Deliver screen you have three options. You can email the invoice to yourself so you can review it and have a copy of it saved in your email. That's always a good idea.
And, of course, you can email your invoices to your Clients and Customers. When you email an invoice to your customer the EzInvoice Pro app will tell you that the email was delivered successfully or not.
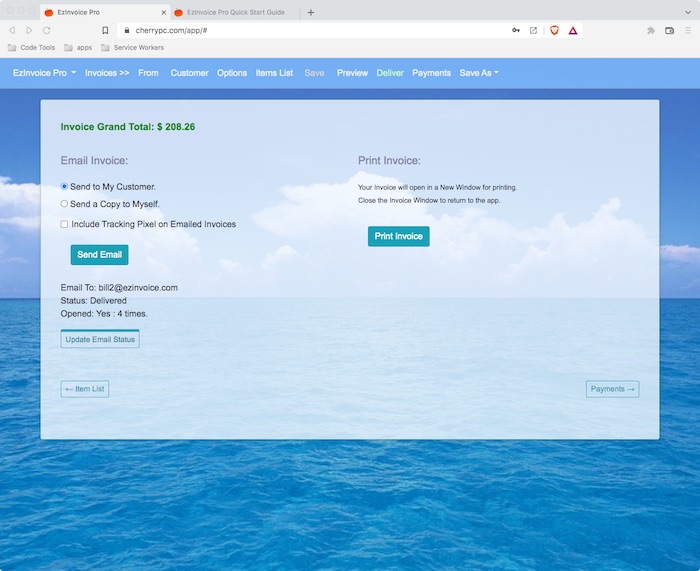
The app can also add what is called a "tracking pixel" to your invoice. This is a tiny 1 pixel image referenced in the HTML of the invoice.
Include a Tracking Pixel in Emailed Invoices
When your client or customer opens the invoice a message is sent to your app and it records that the invoice was opened. This lets you know your client or customer has received and viewed your invoice. EzInvoice Pro only adds a tracking pixel to invoices. It does not add them to any other documents you can make and deliver via email with the app.
Tracking pixels are used because the invoice is a document that could be used in a court of law as evidence. Both the "Delivered" notice and the tracking pixel confirm your invoice was delivered and the tracking pixel confirms it was viewed and how many times it has been viewed with your customer's email apps. Rather or not a court will consider this is up to the judge, but it can reinforce your case when the client claims "I never received the invoice".
That's pretty much all there is to making and delivering an invoice for a new client or customer. It's even faster and easier if your billing someone in your Contacts app for products and services you entered into the Products & Services app. Next we'll go over how you record payments on invoices you've sent.
-------------------------------------------------------------
Keeping Track of Payments with the Invoice App Index-------------------------------------------------------------
To track payments made on an invoice click on the Documents button on the Home Screen and click the "Invoice" button. This brings up a list of your most recent invoices. If the invoice you're wanting to enter a payment for isn't on it use the "Search for Invoices" and enter the invoice number or the name of the business you sent the invoice to, or even a few letters of a product you billed them for in the invoice "Item List". Pretty much any info you entered into the invoice will bring it up when you do a search.
From the list of invoices click the "Edit" button for the invoice you want to enter a payment for. After the invoice loads click the "Payments" link in the Nav Bar.

Below the "Invoice Details" is where you enter payment info so scroll down to that and you'll see a checkbox with the label "Check to Mark as Paid".
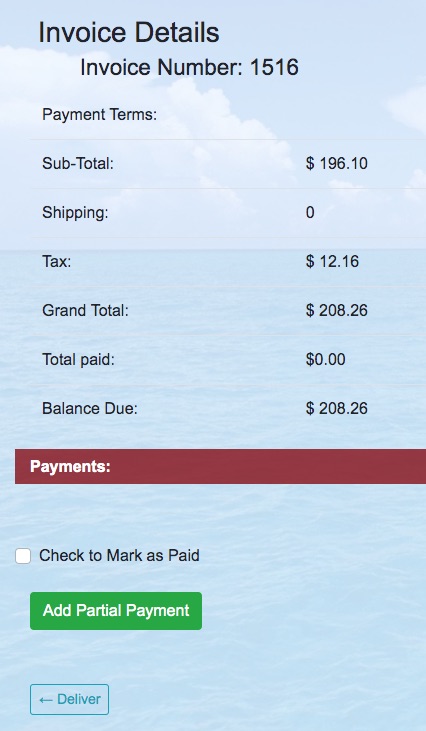
If your invoice has been paid you can just check this and you'll see the current date, total amount of the invoice, and a note that says "Paid in full on" and the current date. You can edit those if you want and then click the "Save" link in the Nav Bar.

Below the checkbox is a "Add Partial Payment" button. You can use this to track more than one payment on your invoice.
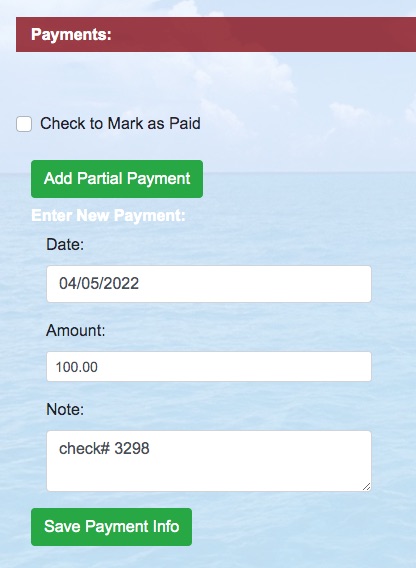
When you click the "Add Partial Payment" button you'll see a form where you can enter the date of payment, the amount paid, and a note where you can enter, for example, the number on the check your customer paid with. Fill out the form as needed.
When you've finished entering your payment info click the "Save Payment Info" button.
You'll see the "Invoice Details" get updated.
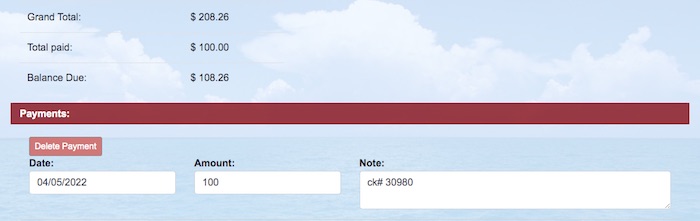
It's important to enter payment info for your invoices so you can easily find any unpaid invoices. This payment info is also used to create your "Income and Expense" reports.
-------------------------------------------------------------
The Documents App Index-------------------------------------------------------------
The Documents app lets you create Estimates, Proposals, Quotes, Receipts, and Purchase Orders.
These all work very similar to the Invoice app so if you've read the user guide for Invoices you'll already be familiar with how it works.
There is also a simple "Text" app that lets you create .html documents that you can print and email. It works like you'd expect it to.
-------------------------------------------------------------
The Products and Services App Index-------------------------------------------------------------
The Products and Services app lets you create a list of products and services you bill for.
To get started click the "Product & Services" button on the Home screen. This brings you to the "Products" page.
To enter a new product or service click the "Add New Product" link in the Nav Bar.

This brings up a form to enter info on your product.
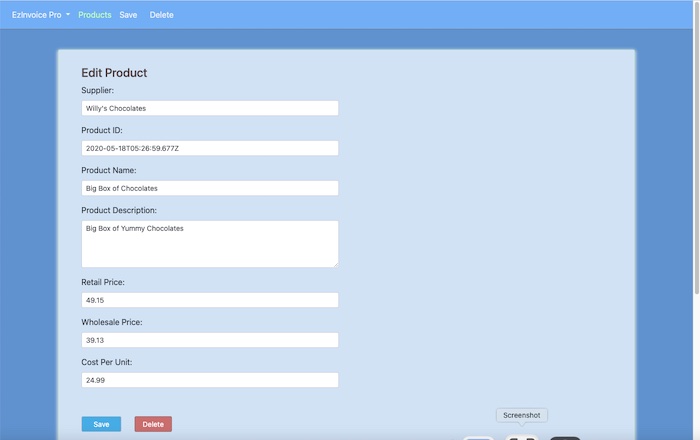
You'll enter the "Supplier" name for the product. This can be you, or whoever you purchase the product from.
After that you can enter a "Product ID". This can be whatever you want but it should be unique.
Next you'll enter the "Product Name". Again, this can be whatever you want.
Next you'll enter the "Product Description". This too can be whatever you want and will be used in the "Description" in your "Item List" on invoices and other documents.
After that you'll enter the "Retail Price" and "Wholesale Price". This is the amount you'll charge your clients and customers for the product or service.
The Wholesale Price is used for clients and customers that you've selected the "Contact Type" as "Wholeseller" in the Contacts app.
Finally, you'll enter what the product or service cost you. This is not shown on your documents and is for your use only.
After you've filled out the form click the "Save" button below the form and your done.
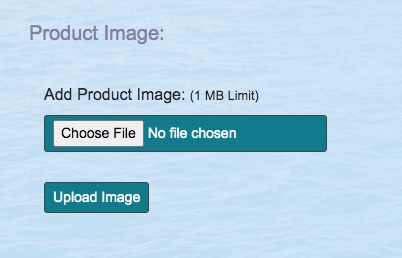
You can also add a "Thumbnail" size photo of your products. These images will be used in your "Item List" on your invoices and other documents.
We recommend your product images be no larger than 200 x 200 pixels. The app will alert you if the image file size is too large when it's over 200k. In that's case you need to either make the image smaller in height/width or compress the image file.
To add a product image just click the "Choose File" button and select the photo you want to upload and then click the "Upload Image" button.
-------------------------------------------------------------
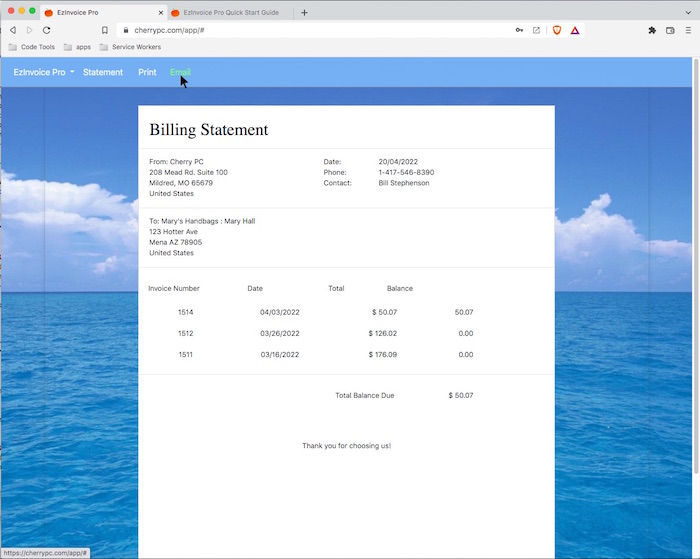
Billing Statements Index-------------------------------------------------------------
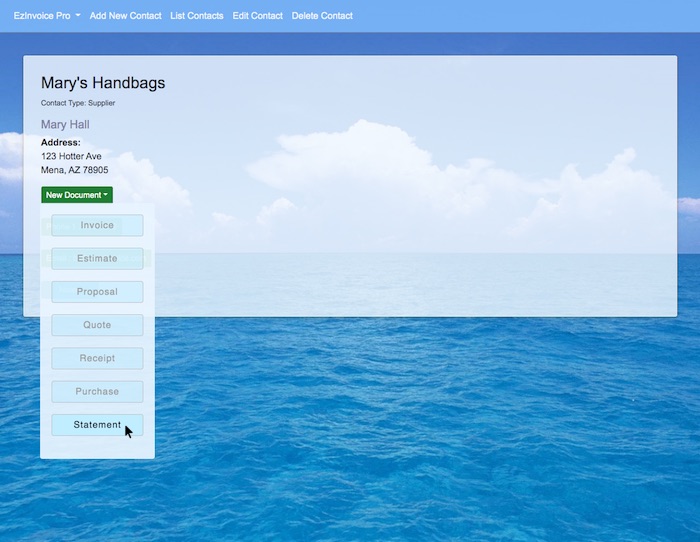
You can create and send Monthly Billing Statements that show total billed, total paid, and total due for a selected date range for a selected Client or Customer.
To create a Billing Statment you start by selecting a Client or Customer from your "Contacts" app and then click on the "New Document" link and select "Statement.
Then select your data range for the Statement:
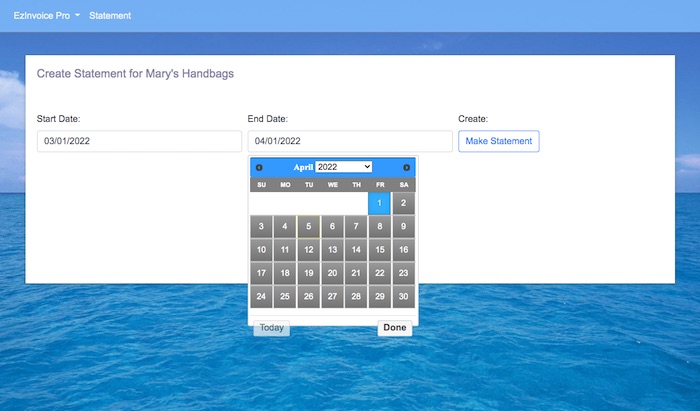
Next click the "Make Statement" button:

Next click the "Deliver Statement link
You can print and email Billing Statements.
-------------------------------------------------------------
The Expenses App Index-------------------------------------------------------------
The expenses app lets you categorize and track all of your business expenses. You can create an expense account for anything you purchase. For example, you can create an expense account for electric bills and another for car payments and another for office equipment and supplies.
You can create as many expense accounts as you want. Each account will be listed on the Expenses screen.
To get started click on the "View Expenses" button on the home screen.
This will bring you to the Expense App where your expense accounts will be listed:
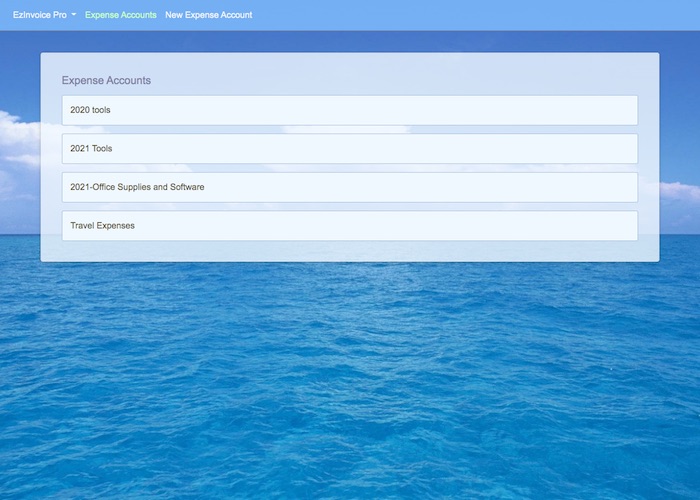
To view and add expenses to an existing Expense Account select the name of the account from the list of expense accounts you've created.
You'll see a summary of your expenses in that Expense Account:
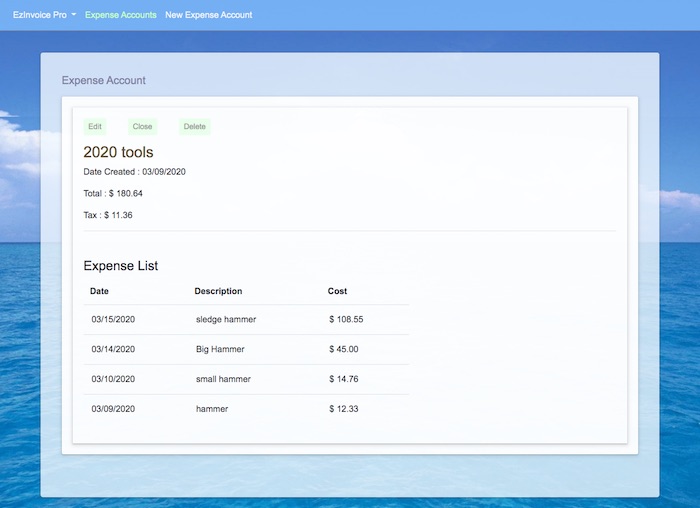
Click "Edit" to add new expenses to an account and edit existing expenses.
To create a new expense account click on the "New Expense Account" link in the Nav Bar.

This will bring you to the New Expense Account Screen:
Give your expense account a name and enter the Start Date for the account
Below the name and date is where you enter your expense info.
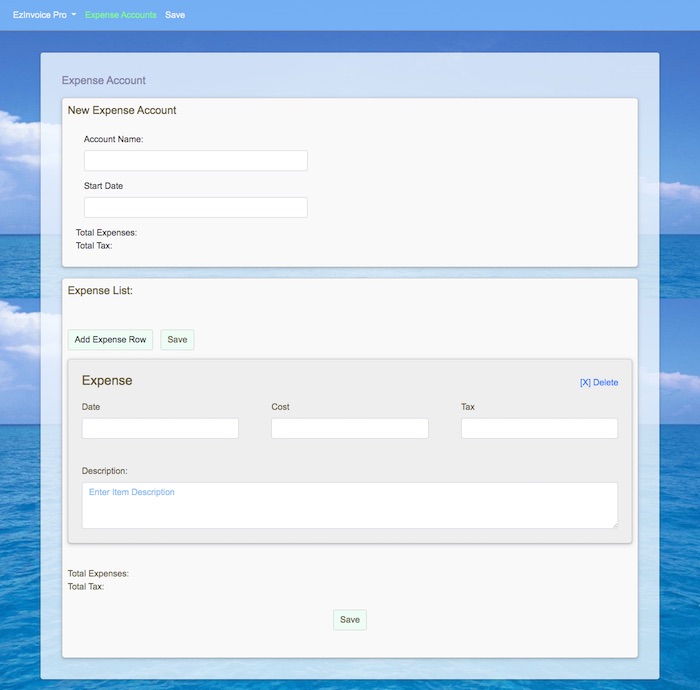
Enter the date you incurred the expense, the cost, and the tax paid.
After that you can enter a "Description" of the expense.
You can add as many expenses to an expense account as you want.
When you're all finished adding expenses click the "Save" link in the Nav Bar
-------------------------------------------------------------
The Reports App Index-------------------------------------------------------------
The Reports app uses the data you've entered in your invoices and expenses apps to create your reports.
The Reports app lets you create 6 kinds of reports:
Financial Reports:
Billing Reports:
Customer Reports:
All Reports are for the Year/Month you enter/select.
You can change the year for the report in the "Enter Year" text box.
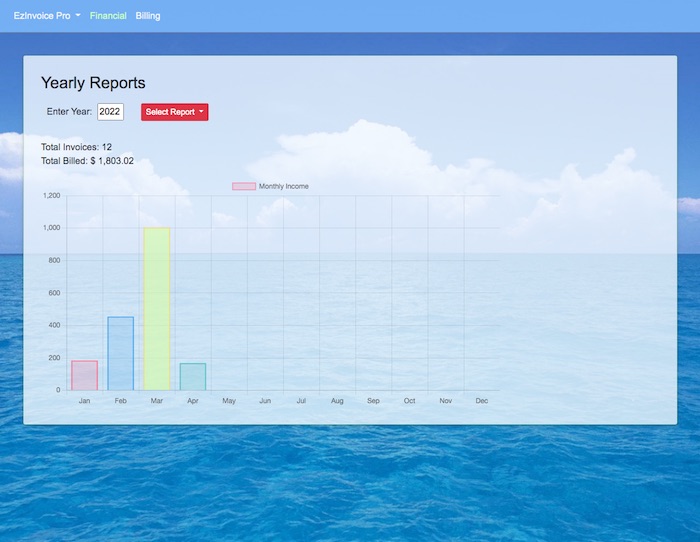
The Monthly Income report creates a Bar Chart that shows how much you've billed for each month in the year you've selected and provides the number of invoices, and the Total Billed for that month.
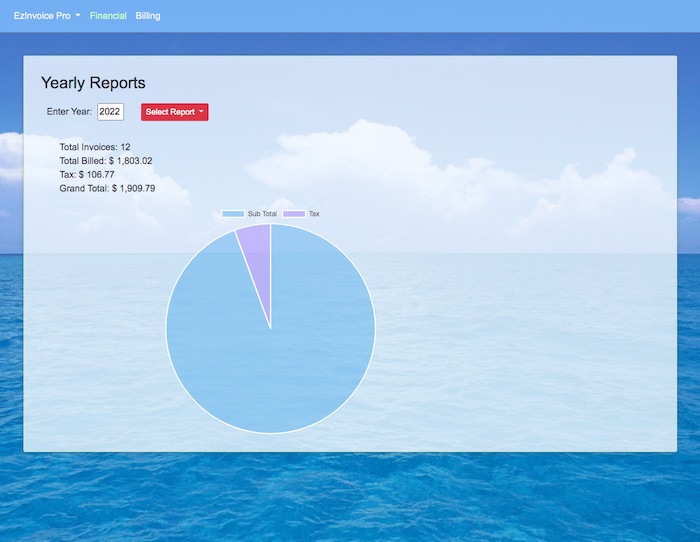
The Total Billed report shows the the number of invoices and the total billed and total tax for all of those invoices.
The Monthly Expenses report shows your total monthly expenses in a Bar Chart and the total expenses you were billed for.
The Total Expenses report shows Expenses Subtotal, Expenses Tax total, and the Grand Total for all your expenses and tax paid on them.
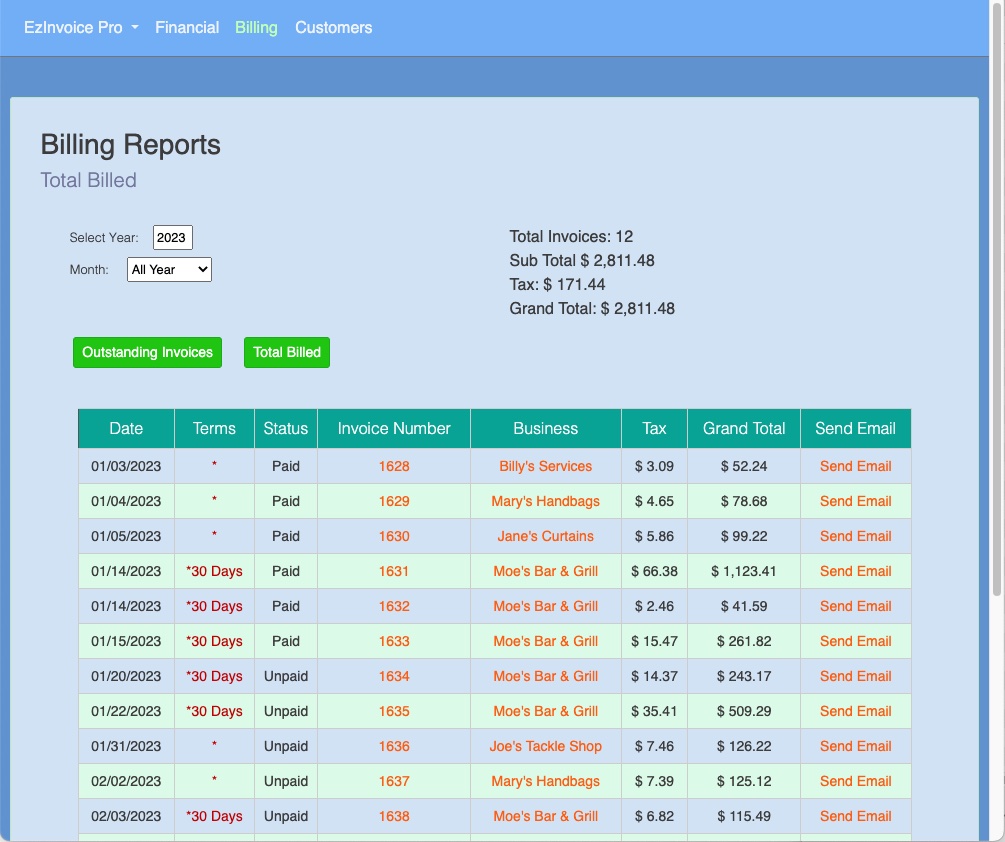
The Billing Report shows all your unpaid and partially paid invoices for the selected year. It also provides the total billed, the amount due, if the paymemts on an invoice are overdue, and total amount you've billed, total tax billed, total collected, and the total amount you're owed.
The Billing Report also provides an easy way to list and send gentle email reminders to Customers/Clients that they're overdue on paying an invoice.
The Customer Report provides an easy way to list all of the invoices for a selected customer by year and just invoices with a balance due and email gentle reminders for overdue invoice payments.
-------------------------------------------------------------
The Free App Index-------------------------------------------------------------
The free app runs entirely in your web browser. Modern web browser have a built-in database called "IndexedDB" and it's compatible with our Enterprise grade CouchDB database running on our Cloud Servers.
This makes it easy for us to provide the free app and easy for you to upgrade when you're ready.
Things you need to know about the free app...
Since your Contacts and Documents and other data are stored in your web browser you should make a copy of your invoices and other documents and data and save them. You can do that by printing them to paper or a PDF file.
There are some features that just don't work in the free app so we've removed them from it. It makes no sense to have a button that doesn't work, like a button to email your invoice. We didn't do that make it harder for you, we did it because there's no way to use those features without a secure connection to our servers and you need a user account to do that.
-------------------------------------------------------------
The Demo App Index-------------------------------------------------------------
The Demo app also has some missing features. We can't let random users send bogus invoices with our email server but it does have enough features to provide a good demonstration of how the app works and most of the features it has.
It has a few example Customers and Invoices and Products so you can see how things work without having to enter a bunch of data.
So the Demo app is also a great resource to learn how to use the app and teach employees how to use it.